
Your air compressor is the heartbeat of your workshop. Whether you’re running a pancake compressor for nail guns or a portable unit for tire inflation, a breakdown can grind your projects to a halt. The good news? Many common air compressor problems have simple, DIY fixes that don’t require a mechanic’s certificate or expensive tools.
In this guide, we’ll walk through the most frequent issues—from “won’t start” to “spitting water”—and give you step-by-step repair instructions. We’ll also highlight reliable tools like the CRAFTSMAN Air Compressor, 2 Gallon Portable and the DEWALT Pancake Air Compressor, 6 Gallon, 165 PSI (DWFP55126) to show you what to look for when troubleshooting.

Problem #1: Air Compressor Won’t Start
This is the most frustrating problem—and often the easiest to fix.
Possible Causes
- Tripped circuit breaker – A power surge or motor overload can flip the breaker.
- Faulty pressure switch – The switch may fail to close the circuit.
- Bad check valve – If the tank holds pressure but the compressor can’t restart, the check valve may be stuck.
- Blown thermal overload – Overheating can trip the internal protector.
- Dead capacitor – On larger units, a start capacitor can fail.
DIY Fixes
- Check the power source. Plug another tool into the same outlet to confirm power. Reset any tripped breakers.
- Inspect the pressure switch. Remove the cover and look for burn marks. Use a multimeter to check continuity. If open when the tank is below cut-in pressure, replace the switch.
- Test the check valve. Remove the valve (usually near the tank inlet) and blow through it—air should pass one way only. Clean or replace if stuck.
- Let the compressor cool. If thermal overload tripped, wait 30 minutes, then press the reset button (usually on the motor housing).
- Check the capacitor. A bulging or leaking capacitor needs replacement. Discharge it safely first.
Pro tip: Many portable compressors like the ECOMAX Air Compressor 6 Gallon 150 PSI Pancake have built-in thermal protection—always let it cool before restarting.
Problem #2: Low Air Pressure or Slow Recovery
Your compressor runs, but the pressure never reaches the set point—or it takes forever to build up.
Possible Causes
- Leak in the system – Hose, fittings, or tank drain valve could be leaking.
- Worn piston rings or valves – Internal leakage reduces efficiency.
- Clogged intake filter – A dirty filter restricts airflow.
- Faulty unloader valve – Stays open during compression.
- Tank check valve stuck open – Air bleeds back into the pump.
DIY Fixes
- Perform a leak test. Apply soapy water to all fittings, hoses, and the tank drain. Bubbles indicate a leak—tighten or replace.
- Clean or replace the intake filter. Most filters are washable with soap and water. Dry thoroughly before reinstalling.
- Check the unloader valve. It should close when the compressor starts. If it’s stuck, clean with brake cleaner or replace.
- Inspect the check valve. Remove and test as in Problem #1. Replace if air flows both ways.
- Test the pressure switch cut-in/cut-out. With a gauge, verify the switch turns on at the correct low pressure (usually 30–40 PSI below cut-out). Adjust or replace if needed.
Expert insight: Oil-free compressors like the PORTER-CABLE C2002-ECOM are more prone to valve wear after heavy use. If your unit is older than 5 years and loses pressure, a valve rebuild kit may restore performance.
Problem #3: Compressor Runs Continuously (Never Shuts Off)
A compressor that never stops is not only annoying but also dangerous—it can overheat and damage the pump.
Possible Causes
- Pressure switch failure – Stuck in the “on” position.
- Leak larger than pump can keep up with – A major leak keeps the pressure below cut-out.
- Faulty unloader valve – If it fails to close, the pump runs unloaded but can’t build pressure.
- Oversized demand – Tool CFM exceeds compressor capacity.
DIY Fixes
- Turn off the compressor and unplug it. Listen for air hissing. A continuous hiss means a big leak—find and fix it.
- Test the pressure switch. With the tank empty, manually lift the switch lever. It should click and start the motor. When you release, it should click off. If it stays on, replace the switch.
- Check the unloader valve. On most reciprocating compressors, the unloader bleeds pressure from the pump head when the motor stops. If it stays open, the pump can’t build pressure. Replace if faulty.
- Match your tool to the compressor. A DEWALT Tire Inflator Portable uses far less CFM than an impact wrench. If your compressor runs non-stop with a high-consumption tool, you may need a larger tank or higher CFM unit.
Problem #4: Excessive Vibration or Noise
Air compressors are naturally noisy, but sudden rattles or shaking indicate trouble.
Possible Causes
- Loose mounting bolts – Vibration loosens fasteners over time.
- Worn pump bearings – Grinding or knocking sounds mean bearing failure.
- Broken motor fan – A clicking or scraping sound.
- Unbalanced flywheel – On belt-driven models, a misaligned pulley.
- Air tank water sloshing – Excess condensation can cause thumping.
DIY Fixes
- Tighten all bolts. Check feet, pump mounts, and motor bracket. Use thread locker for future prevention.
- Drain the tank. Open the drain valve fully until no water comes out. Perform this weekly per Air Compressor Maintenance Schedule.
- Inspect the fan. If blades are cracked, replace the fan. Ensure no debris is caught.
- Listen for bearing noise. If the pump sounds like it’s grinding, stop using the compressor—bearing failure can lead to catastrophic damage. Replace the pump head or consider a new compressor.
- Check the pulley alignment (belt-driven units). Use a straightedge. Loosen the motor mounting bolts, adjust alignment, and retighten.
Problem #5: Oil in the Air Output (Oil-Lubricated Models)
If you see oil mist coming from your air hose or tool, you have a problem.
Possible Causes
- Overfilled crankcase – Excess oil gets blown into the air.
- Worn piston rings – Oil bypasses the rings and enters the compression chamber.
- Clogged or failed check valve – Oil leaks back into the pump.
- Damaged compressor oil pump (on larger units).
DIY Fixes
- Drain and refill oil to the correct level. Use the recommended viscosity (usually SAE 30 non-detergent). Check the dipstick or sight glass.
- Replace piston rings. This is an advanced repair: you’ll need a ring compressor and a service manual. For small oil-free units, this isn’t applicable.
- Install an inline oil separator. A filter/regulator/lubricator (FRL) unit with a coalescing filter can trap oil mist before it reaches your tools.
- Consider switching to an oil-free compressor. Models like the CRAFTSMAN V20 Cordless Tire Inflator are inherently oil-free—perfect for clean applications.
Problem #6: Water in the Air Lines
Moisture is the enemy of your tools and projects. It causes rust, blows paint finishes, and damages air tools.
Causes
- High humidity – Ambient moisture condenses inside the tank.
- No water separator – Without filtration, water travels downstream.
- Infrequent tank draining – Water accumulates faster than you think.
- Compressor running hot – Hot air holds more moisture, which condenses as it cools.
DIY Fixes
- Drain the tank after every use. Open the drain valve while the tank still holds pressure. Let moisture blow out. See How to Drain Your Air Compressor Tank the Right Way.
- Install a water separator at the regulator outlet. A simple bowl-type separator costs under $20.
- Use a longer air hose. The extra length allows air to cool and moisture to condense before reaching the tool.
- Add an automatic drain valve. These timer-based or float-style valves bleed water without manual effort.
Problem #7: Compressor Tripping the Breaker
If your compressor repeatedly pops the circuit breaker, it’s a safety hazard.
Causes
- Overloaded circuit – Motor draws more amps than the breaker rating.
- Faulty start capacitor – Causes excessive current draw.
- Worn motor bearings – Increased friction = higher amperage.
- Low voltage supply – Long extension cords or undersized wiring.
- Stalling due to pressure – Check valve failure causes back pressure.
DIY Fixes
- Use a dedicated circuit. Most residential compressors need a 15A or 20A circuit. Unplug other devices.
- Eliminate extension cords. If you must use one, choose 12-gauge or thicker, and keep it short.
- Test the start capacitor as in Problem #1. Replace if weak.
- Measure voltage at the outlet. Should be 115–125V (standard) or 230–240V (240V units). Low voltage causes high amps.
- Inspect the pressure switch. Ensure it’s cutting out at the correct pressure (usually 135–155 PSI). Adjust if needed.
Deep dive: Our article Why Your Air Compressor Keeps Tripping the Breaker (And What to Do) covers every detail.
Problem #8: Motor Overheating and Shutting Off
Thermal overload is a built-in safety feature, but if it trips frequently, find the root cause.
Causes
- Inadequate ventilation – Compressor placed in a closet or corner.
- Dirty cooling fins or fan – Airflow blocked.
- Low oil level (oil-lubricated).
- Pump overworked – Running too long without rest.
DIY Fixes
- Move the compressor to an open area. Allow at least 12 inches of clearance on all sides.
- Clean the motor fins with compressed air or a soft brush.
- Check oil level and top off if low.
- Cycle the compressor properly. Most units have a 50% duty cycle—run for 10 minutes, rest for 10. For continuous use, consider a The Best Quiet Air Compressors for Indoor Use.
Problem #9: Air Blow Gun Not Working or Weak Airflow
A weak blow gun is often mistaken for a compressor problem, but the fix can be simple.
Causes
- Clogged nozzle – Dust and debris block airflow.
- Hose kink or restriction – Too narrow or too long.
- Regulator set too low – Inlet pressure insufficient.
- Wrong blow gun type – Some have pressure-reducing triggers.
DIY Fixes
- Remove the nozzle and clean it. Soak in warm soapy water, then blow out with air.
- Check the hose. Use a Air Hose Size Guide: Picking the Right Diameter for Your Tools to ensure it’s at least 3/8” ID for blow guns.
- Increase regulator pressure to 90–100 PSI.
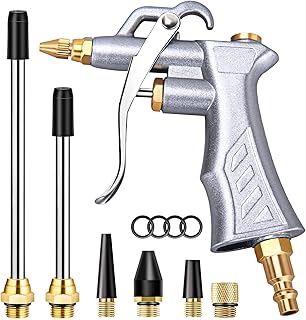
- Upgrade to a quality blow gun. The JASTIND Industrial Air Blow Gun has a brass adjustable nozzle and steel extensions—great for cleaning.
Problem #10: Air Tool Kit Lacks Power (Even with Good Pressure)
Sometimes the compressor is fine, but the tool underperforms.
Causes
- Tool not matched to compressor CFM – Impact wrenches need 3–5 CFM at 90 PSI.
- Air hose too long or narrow – Pressure drop over distance.
- Quick connects leaking – O-rings wear out.
- Tool needs lubrication – Air tools require oil.
DIY Fixes
- Compare tool CFM to compressor output. A DYNAMIC POWER 50 Pieces Air Tool Kit includes an impact wrench, ratchet, and hammer—all require decent CFM. If your compressor can’t keep up, consider a larger tank.
- Use the shortest possible hose for high-demand tools. For long runs, increase hose diameter.
- Replace quick-connect couplers if they leak. A $5 rebuild kit can fix many.
- Add a few drops of air tool oil into the tool inlet before use.

Preventive Maintenance: The Real Fix
Most problems are avoidable with a simple routine. Here’s a weekly, monthly, and yearly checklist:
| Frequency | Task | Why |
|---|---|---|
| After each use | Drain the tank | Prevents rust and water in lines |
| Weekly | Check oil level (if applicable) | Ensures proper lubrication |
| Monthly | Clean intake filter | Maximizes airflow and efficiency |
| Monthly | Inspect hoses and fittings | Catches leaks early |
| Quarterly | Test pressure switch and unloader | Avoids run-on failures |
| Yearly | Replace oil (oil-lubricated) | Prolongs pump life |
| Yearly | Check and tighten all bolts | Reduces vibration damage |
For a full schedule, read Air Compressor Maintenance Schedule: A Monthly Checklist.
When to Call a Pro vs. When to DIY
Not every repair is a candidate for DIY. Use this table to decide:
| Issue | DIY | Call Pro |
|---|---|---|
| Tripped breaker | ✅ (Check circuit) | ❌ |
| Leaking hose | ✅ Replace coupler | ❌ |
| Pressure switch failure | ✅ Replace (easy) | ❌ |
| Worn piston rings | ❌ (complex) | ✅ |
| Motor burn-out | ❌ (hazardous) | ✅ |
| Tank corrosion | ❌ (safety risk) | ✅ Replace tank |
Safety note: Never attempt to weld or repair a rusted air tank. A catastrophic rupture can cause severe injury. Replace the entire compressor.
Final Thoughts: Know Your Compressor
Owning an air compressor means understanding its quirks. From the compact CRAFTSMAN V20 Cordless Inflator to the heavy-duty DEWALT DWFP55126, every model has its weak spots—but most are fixable with basic tools and a little know-how.
Start with the simplest fix (drain the tank, clean the filter). Move through the list systematically. And when in doubt, replace small components like the pressure switch or check valve—they cost under $30 and can save you hundreds on a service call.
For deeper dives into specific topics, check out:
- Oil-Free vs Oil-Lubricated Air Compressors: Which One Fits Your Workshop
- How to Drain Your Air Compressor Tank the Right Way
- Pancake, Hot Dog, and Twin Stack Compressors Explained
Now go fix that compressor—and get back to building.