
Keeping your air compressor in peak condition is not just about extending its lifespan — it’s about safety, efficiency, and consistent performance. Whether you own a compact ECOMAX Air Compressor 6 Gallon 150 PSI for home garage use or a heavy-duty unit for a professional workshop, a structured monthly maintenance routine can prevent costly breakdowns and downtime.
This guide delivers a detailed monthly checklist, expert insights, and actionable steps that align with the E-E-A-T principles. You’ll learn exactly what to inspect, clean, and replace — and why each task matters. Let’s dive into the maintenance routine that every compressor owner should follow.
Why a Monthly Maintenance Schedule Matters
Air compressors are workhorses, but they are also sensitive to neglect. Moisture, dust, heat, and continuous cycling degrade components faster than most people realize. A monthly schedule helps you:
- Prevent costly repairs by catching small issues early
- Maintain peak efficiency — a well-maintained compressor uses less electricity
- Ensure workplace safety by checking pressure relief valves and electrical connections
- Extend compressor life by years, often doubling the expected service interval
Without regular care, you’ll likely face Common Air Compressor Problems and How to Fix Them Yourself. A monthly checklist is the simplest way to avoid those headaches.
Daily / Pre-Use Checks (Brief Overview)
While this article focuses on the monthly checklist, a quick pre-use inspection adds a layer of protection. Before each use:
- Drain moisture from the tank (if not automatically drained)
- Check oil level on oil-lubricated models
- Verify pressure gauge reads zero when unplugged
- Listen for unusual sounds during startup
These 30-second checks complement your deeper monthly routine. For a complete guide on draining, see How to Drain Your Air Compressor Tank the Right Way.
The Monthly Maintenance Checklist
Perform the following steps once per month (or more often in humid or dusty environments). Use a logbook or app to track completion dates.
1. Drain the Tank Completely
Moisture is the #1 enemy of air compressors. Even with an automatic drain, manual draining ensures no water pooling in low spots.
How to do it:
- Turn off and unplug the compressor
- Relieve all pressure from the tank
- Open the drain valve at the bottom
- Let water escape until only air comes out
- Close the valve
Why it matters: Water left inside accelerates rust, damages the tank’s interior, and contaminates air tools. In winter, trapped moisture can freeze and crack the tank.
2. Check and Replace the Air Filter
A clogged intake filter forces the compressor to work harder, increasing energy consumption and wear.
Inspection steps:
- Remove the filter element
- Hold it up to light — if you can’t see through it, replace it
- For foam filters, wash with mild soap and water, dry thoroughly, then re-oil if required
- For paper filters, tap out debris; replace every 3–6 months or sooner in dusty shops
A clean filter also protects internal valves from grit. Many portable compressors like the PORTER-CABLE Air Compressor, 6-Gallon, Pancake, Oil-Free (C2002-ECOM) use easy-to-access filters that are quick to service.

3. Inspect All Hoses and Fittings
Cracks, bulges, or loose connections lead to air leaks and pressure drops. A small leak can waste 10–20% of compressed air.
Checklist:
- Run a soapy water solution over fittings while the system is pressurized
- Look for bubbles indicating leaks
- Tighten connections with a wrench — do not overtighten
- Replace any hose showing wear or brittleness
- Inspect quick-connect couplers for debris or damage
For hose sizing guidelines, read Air Hose Size Guide: Picking the Right Diameter for Your Tools.
4. Test the Safety (Pressure Relief) Valve
The safety valve is a critical fail-safe that prevents tank over-pressurization. A stuck valve can be catastrophic.
Monthly test:
- With the compressor running and tank pressurized, pull the ring on the safety valve
- You should hear a burst of air releasing
- Let go — the valve should snap shut and stop leaking
- If it hisses continuously after release, replace it immediately
Do not ignore a faulty safety valve. It is the last line of defense against explosions.
5. Inspect Belts and Pulleys (Belt-Driven Models)
If your compressor uses a belt to connect the motor to the pump, check alignment and tension monthly.
Visual inspection:
- Look for cracks, fraying, or glazing on the belt
- Press the belt midway between pulleys — it should deflect about ½ inch
- Check pulley alignment with a straightedge
- Listen for squealing during startup — that signals a loose belt
Replace belts as a pair if you have multiple belts. A broken belt can damage pulley bearings.
6. Clean the Exterior and Cooling Fins
Dust and debris block airflow, causing the compressor to overheat. Overheating leads to oil breakdown and valve damage.
Cleaning steps:
- Unplug and let the compressor cool completely
- Use compressed air (from your own unit, but be careful) or a vacuum with brush attachment
- Focus on the pump’s cooling fins, motor housing, and radiator (if present)
- Wipe down the tank exterior with a damp cloth to remove oil residue
For oil-free models like the DEWALT Pancake Air Compressor, 6 Gallon, 165 PSI (DWFP55126), keeping fins clean is especially important since they rely entirely on air cooling.

7. Check and Change Oil (Oil-Lubricated Models)
Oil-lubricated compressors need monthly level checks and periodic oil changes. Use only the manufacturer-recommended viscosity.
Monthly steps:
- Check oil level through the sight glass or dipstick when the compressor is cold
- Top off if low — use non-detergent compressor oil (ISO 100 or 150)
- Inspect the oil’s color: dark, milky, or gritty oil indicates contamination
- Change oil every 3 months or 500 hours of run time, whichever comes first
For a deeper comparison of lubricated vs. non-lubricated systems, see Oil-Free vs Oil-Lubricated Air Compressors: Which One Fits Your Workshop.
8. Inspect the Pressure Switch and Unloader Valve
The pressure switch controls when the compressor starts and stops. The unloader valve releases trapped air from the pump head after shutdown, making it easier for the motor to restart.
Monthly inspection:
- Listen for the pressure switch clicking on/off within the correct range
- Watch the pressure gauge — if it overshoots the cut-out setting, the switch may need adjustment or replacement
- Check that the unloader valve hisses briefly when the compressor stops (that’s normal)
- If the compressor struggles to restart, the unloader valve might be stuck
A faulty pressure switch is a common cause of the issue detailed in Why Your Air Compressor Keeps Tripping the Breaker (And What to Do).
9. Check for Air Leaks System-Wide
Even small leaks waste energy and cause short-cycling. Perform a thorough leak check monthly.
Method:
- Pressurize the system to full operating pressure
- Turn off the compressor
- Listen for hissing sounds around fittings, valves, and the tank drain
- Use a ultrasonic leak detector or soapy water for pinpointing
- Mark each leak and fix it with thread sealant or replacement parts
Leaks increase run time, wear out motors faster, and raise your electric bill. Fixing them is one of the highest-ROI maintenance tasks.
Monthly Tasks by Compressor Type
Different designs require slightly different care. Use this table to see which tasks apply to your unit.
| Maintenance Task | Oil-Free Compressor | Oil-Lubricated Compressor | Belt-Driven Compressor |
|---|---|---|---|
| Drain tank | ✅ Yes | ✅ Yes | ✅ Yes |
| Check/replace air filter | ✅ Yes | ✅ Yes | ✅ Yes |
| Inspect hoses & fittings | ✅ Yes | ✅ Yes | ✅ Yes |
| Test safety valve | ✅ Yes | ✅ Yes | ✅ Yes |
| Inspect belts & pulleys | ❌ (direct drive) | ❌ (direct drive models) | ✅ Yes |
| Clean cooling fins | ✅ Yes | ✅ Yes | ✅ Yes |
| Check oil level | ❌ No oil | ✅ Yes | ✅ Yes |
| Change oil | ❌ Not needed | ✅ Every 3 months | ✅ Every 3 months |
| Test unloader valve | ✅ Yes | ✅ Yes | ✅ Yes |
Oil-free compressors like the CRAFTSMAN Air Compressor, 2 Gallon Portable (B0DLKSR6LD) are lower maintenance but still require tank draining and filter changes. Belt-driven units add belt tension and alignment to your monthly list.
Essential Tools for Maintenance
Having the right accessories makes maintenance faster and safer. Here are some highly-rated options from the Amazon data.
Air Blow Guns for Cleaning
A good blow gun is invaluable for cleaning compressor fins and workbench debris.
- JASTIND Industrial Air Blow Gun ($11.99, rating 4.6) — Brass adjustable nozzle with two steel extensions. Perfect for reaching tight spaces.
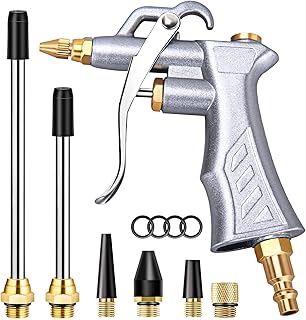
- High Volume Powerful Industrial Air Blow Gun ($12.99, rating 4.6) — Extensible stainless steel nozzle with 360° swivel hook. Ideal for cleaning large equipment.
Tool Kits for Repairs and Accessories
A comprehensive air tool kit can help you service your compressor and perform other jobs.
- DYNAMIC POWER 50 Pieces Air Tool Kit ($99.99, rating 4.4) — Includes impact wrench, ratchet wrench, air hammer, and chisels. Useful for maintenance and general workshop tasks.

Portable Tire Inflators for On-the-Go
If you use a cordless inflator for vehicle tires, keep it charged and test it monthly.
- CRAFTSMAN V20 Tire Inflator Portable Air Compressor ($49.00, rating 4.4) — Works as cordless, 120V corded, or 12V car adapter. A versatile backup for your main compressor.

Signs Your Compressor Needs Professional Service
Even with a monthly checklist, some issues require a technician. Watch for these red flags:
- Metal-on-metal grinding sounds — could indicate bearing failure
- Oil in the compressed air output — piston ring or valve wear
- Excessive vibration — misaligned pulleys or unbalanced flywheel
- Rapid short-cycling — pressure switch or check valve failure
- Rust visible outside the tank — internal corrosion may be worse
If you notice any of these, stop using the compressor immediately. Many repairs are covered in Common Air Compressor Problems and How to Fix Them Yourself, but some need professional diagnosis.
Seasonal Maintenance Considerations
Your monthly routine should adjust for weather changes.
Summer / Humid Conditions
- Drain the tank daily if relative humidity exceeds 70%
- Check oil more frequently on lubricated models (moisture accelerates oil degradation)
- Ensure cooling fins are spotless — heat stress is highest in summer
Winter / Cold Conditions
- Use a lower-viscosity oil (ISO 68 instead of 100) if operating below 40°F
- Keep the compressor in a heated space if possible to prevent condensation freeze
- Test the safety valve weekly — ice can block it
For a detailed deep dive on moisture management, read How to Drain Your Air Compressor Tank the Right Way.
Recommended Compressors for Low-Maintenance Ownership
If you’re shopping for a new compressor, consider models that simplify monthly upkeep.
Best Oil-Free Pancake Compressors
- PORTER-CABLE C2002-ECOM (6 gallon, 150 PSI, $164.00, rating 4.6) — Oil-free means no oil changes. Easy-access drain and filter. Great for DIYers.
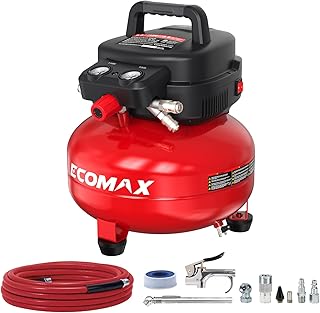
- ECOMAX 6 Gallon ($169.99, rating 4.7) — Features a robust cooling system and 10-piece accessory kit. Excellent value for home garage use.
Best Cordless Option for Light Duty
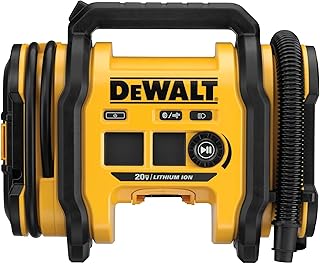
- DEWALT DCC020IB 20V MAX Tire Inflator ($130.22, rating 4.6) — Tool only. Compact, portable, with automatic shut-off. Perfect as a backup inflator.
- CRAFTSMAN V20 CMCE521B ($39.00, rating 4.6) — Budget-friendly cordless inflator. Digital gauge and up to 150 PSI.
For a broader selection, see Pancake, Hot Dog, and Twin Stack Compressors Explained.
Putting It All Together: Your Monthly Checklist PDF
Here’s a quick summary you can print and tape to your compressor:
- [] Drain tank completely
- [] Inspect and clean/replace air filter
- [] Check hoses and fittings for leaks (soapy water test)
- [] Test safety relief valve
- [] Inspect belts and pulleys (if applicable)
- [] Clean cooling fins and exterior
- [] Check oil level (lubricated models)
- [] Test pressure switch and unloader valve
- [] Listen for unusual noises
- [] Tighten all electrical connections (if comfortable)
Complete this checklist monthly, and your compressor will reward you with years of reliable service. For additional tips on workshop setup, see Setting Up Your First Workshop: Tools Every Beginner Needs.
Final Thoughts
An air compressor is an investment in productivity. By dedicating 20 minutes each month to this checklist, you’ll save hundreds in repairs and avoid frustrating downtime. Whether you own a basic CRAFTSMAN 2 Gallon Portable Compressor or a professional-grade unit, consistent maintenance is the key to long-term satisfaction.
Start your monthly routine today — your compressor (and your wallet) will thank you.