
Installing a smart thermostat is one of the most rewarding DIY upgrades you can make to your home. It saves money on heating and cooling, gives you remote control from your phone, and often pays for itself within a year. But many homeowners hesitate, fearing they need a licensed electrician to handle the wiring.
The truth is that most smart thermostat installations are straightforward and safe if you follow a few precise steps. With the right tools and a methodical approach, you can complete the job in under an hour—no electrician required. This guide covers everything: from safety checks and wire labeling to mounting, connecting, and configuring your new device.
Along the way, we’ll highlight how a few workshop tools—including an air compressor—can make the job cleaner and faster. Let’s get started.
Safety First: The One Rule You Never Skip
Before touching any wire, turn off the power to your HVAC system at the breaker panel. Do not rely on the thermostat’s “off” switch—the circuit may still be live at the wires. Flip the breaker that controls your furnace or air handler.
Confirm the power is off by testing the old thermostat: try to turn on the system. If nothing happens, you’re clear. Use a non-contact voltage tester (a cheap safety tool) on the wires inside the wall plate. If the tester lights up, go back and kill the right breaker.
Pro tip: If you can’t identify which breaker feeds the thermostat, turn off the main breaker for the whole house. It’s a small inconvenience for absolute safety.
Tools and Supplies: What You’ll Need
Gather everything before you start. You likely already own most items.
Essential Tools
- Flathead and Phillips screwdrivers (small to medium sizes)
- Wire strippers (or a multi-tool with a 22–18 gauge stripping hole)
- Needle-nose pliers
- Level (a 6-inch torpedo level works perfectly)
- Power drill with assorted bits (for mounting screws and anchors)
- Non-contact voltage tester (mandatory for safety)
- Smartphone or tablet (for the setup app)
Optional but Highly Recommended
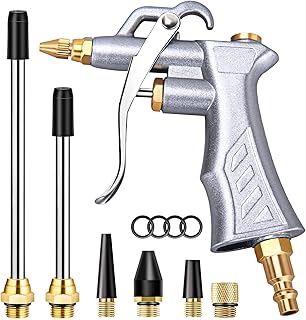
- Air compressor with a blow gun attachment for cleaning dust and debris from the wall opening and old wiring cavities. This ensures a clean mount and prevents loose dirt from fouling connections.
- Small flashlight or headlamp
- Cordless drill/driver for quick screw driving
If you have a workshop air compressor, using it to blow out the old hole is a game-changer. Two excellent choices are the CRAFTSMAN 2‑Gallon Portable Air Compressor (125 PSI, oil‑free) and the PORTER‑CABLE 6‑Gallon Pancake Compressor. Both are compact enough to bring indoors.


Pair your compressor with an Industrial Air Blow Gun (like the brass adjustable nozzle model from JASTIND) for precise dust removal.
Using a compressor might seem overkill, but you’ll thank yourself when you don’t have to sweep up plaster dust later. For more on choosing the right size, read our guide on How to Choose the Right Air Compressor Size for a Home Garage.
Supplies
- Smart thermostat (Nest, ecobee, Honeywell, etc.)
- Mounting screws and wall anchors (usually included)
- Painter’s tape and a permanent marker (for labeling wires)
- Small piece of cardboard (to hold wires while you work)
Step 1: Remove the Old Thermostat
With power confirmed off, gently pull the old thermostat’s faceplate away from the wall. Most snap off or are held by small screws. Set the faceplate aside.
You’ll see the base plate with a bundle of wires connected to screw terminals. Do not disconnect anything yet.
Take a photo of the existing wiring with your phone. This is your backup if labels get lost. Also note the terminal letters (R, W, Y, G, C, etc.) and the color of each wire connected.
Expert insight: Many “dead” thermostats are actually fine—their wiring is just old or loose. A photo gives you a reference that beats any manual.
Step 2: Label Every Wire
This is the most critical step. Use small pieces of painter’s tape around each wire, writing the terminal letter from the old thermostat. For example: if a red wire went to the R terminal, label it “R”. If there’s a blue wire on C, label it “C”.
Common wire colors and their functions:
| Wire Label | Common Color | Function |
|---|---|---|
| R / Rh / Rc | Red | Power (24VAC) |
| W / W1 | White | Heat |
| Y / Y1 | Yellow | Cool (compressor) |
| G | Green | Fan |
| C | Blue or Black | Common (return path) |
| O/B | Orange or Dark Blue | Heat pump reversing valve |
Some systems have additional wires for auxiliary heat (W2), second-stage cooling (Y2), or humidity control. Label them exactly as you see on the old terminals.
Do not rely on wire colors alone—a previous installer may have used non‑standard colors. The labels from the old terminals are your truth.
Once all wires are labeled, unscrew each terminal and gently pull the wires free. Wrap the bundle loosely around your finger so they don’t fall back into the wall.
Step 3: Check for a C-Wire (Common Wire)
A C-wire provides continuous 24V power to the thermostat. Without it, many smart thermostats (especially Wi‑Fi‑enabled ones) may work only intermittently or require a battery that needs frequent recharging.
Check your labeled wires. If you have a C wire (usually blue or black), you’re golden. If you don’t, you have three options:
- Use a power extender kit (PEK) included with many smart thermostats (ecobee, for example).
- Repurpose the G-wire as a C-wire (you lose the ability to run the fan independently—acceptable for some users).
- Use a plug-in power adapter for the thermostat (requires a nearby outlet).
If you lack a C-wire, consult your thermostat’s compatibility checker before proceeding. Many homeowners successfully install without one by using the PEK, which connects at your furnace control board.
For a deeper look at wiring challenges, see Common Air Compressor Problems and How to Fix Them Yourself—the troubleshooting principles (testing continuity, checking connections) are similar.
Step 4: Prepare the Wall Surface
Remove the old base plate. You may need to patch screw holes if the new plate doesn’t line up. Use drywall compound or spackle for small holes—let it dry for 15–20 minutes.
Important: Any dust or debris in the wall cavity can cause thermostat malfunction over time (especially on exposed circuit boards). Use your air compressor with the blow gun to blow out the hole thoroughly.
If you don’t own a compressor, a can of compressed air (like for keyboards) works in a pinch, but it’s far less powerful.
Step 5: Mount the New Base Plate
Hold the new thermostat’s base plate against the wall. Use a level to ensure it’s perfectly horizontal. Mark the drill holes with a pencil.
Drill pilot holes. For drywall, use the included anchors—tap them in gently with a hammer. For plaster or concrete, use a masonry bit. Screw the base plate in place, but don’t overtighten (plastic can crack).
Now feed the labeled wires through the opening in the base plate. You may need to straighten them with pliers.
Tip: If your walls are uneven, a small shim behind the plate can prevent a skewed look. A cordless drill with adjustable clutch makes this step effortless.
Step 6: Connect the Wires to the Smart Thermostat
Push each wire into its matching terminal on the base plate or thermostat body (depending on your model). Most modern smart thermostats use push‑in connectors rather than screws—just insert the stripped wire end until it clicks.
Strip about 3/8 inch (9 mm) of insulation from each wire end if needed. Use the correct gauge hole on your stripper. A clean strip prevents shorts.
Match your labeled wires to the terminal letters on the smart thermostat. Typical mapping:
| Old Label | New Terminal |
|---|---|
| R / Rh / Rc | R |
| W / W1 | W |
| Y / Y1 | Y |
| G | G |
| C | C |
| O/B | O/B |
| W2 | W2 |
| Y2 | Y2 |
Double-check each connection by gently tugging the wire to confirm it’s seated. Loose wires are the #1 cause of “dead” thermostats after installation.
If your system is a heat pump, pay extra attention to the O/B terminal—some systems energize this in cool mode, others in heat. Your thermostat’s setup wizard will ask.
Step 7: Attach the Thermostat Faceplate and Restore Power
Snap the smart thermostat faceplate onto the base. It should click into place without forcing.
Go to your breaker panel and flip the HVAC breaker back on. Within 30 seconds, the thermostat screen should light up. If it doesn’t, power may still be off, or the C‑wire connection is faulty. Turn power back off and check.
Step 8: Connect to Wi‑Fi and Configure via App
Launch the manufacturer’s app (Google Home for Nest, ecobee app, etc.). Follow the on‑screen instructions to connect your thermostat to your home Wi‑Fi. You’ll typically:
- Scan a QR code or enter a pairing code shown on the thermostat screen.
- Name the device (e.g., “Living Room”).
- Set your preferred schedule and temperature presets.
- Connect to smart home assistants (Alexa, Google Assistant, Apple HomeKit) if desired.
Most apps walk you through a system test—they’ll run the fan, then heat, then cool to verify wiring is correct. If the test fails, the app will give troubleshooting hints. Do not skip this test.
Common Issues and How to Fix Them
Thermostat Won’t Power On
- No C‑wire? Check if your thermostat has batteries (many Honeywells do). Insert fresh AA/AAA.
- Blown fuse on furnace board. Locate the 3‑amp or 5‑amp fuse on your HVAC control board. Replace if blown.
- Tripped breaker. Verify the breaker is fully set to ON.
Wi‑Fi Keeps Dropping
- Distance from router. Move the router closer or install a Wi‑Fi extender. Some thermostats only support 2.4 GHz—ensure your router broadcasts that band.
- Firmware update needed. Check the app for updates.
Heat or Cool Won’t Turn On
- Wiring reversed. Ensure W goes to W, Y to Y, etc. Swap if needed.
- Reversing valve (O/B) setting wrong. In the app, change O/B setting from “cool energized” to “heat energized” or vice versa.
- Furnace safety switch. Some units have a float switch for condensate backup—empty the drain pan.
For more systematic checks, see Why Your Air Compressor Keeps Tripping the Breaker (And What to Do)—the electrical troubleshooting logic (continuity, loose connections, overcurrent) translates directly to HVAC.
When You Should Still Call an Electrician
DIY installation works for 90% of homes, but certain situations require professional help:
- No C‑wire and no easy way to add one (e.g., you don’t want to run new wire through the walls).
- 240V or line‑voltage thermostat systems (common in electric baseboard heat). Smart thermostats for these are rare and require special wiring.
- Multi‑zone or zoning systems with complex damper controls.
- Older homes with knob‑and‑tube wiring—extremely brittle, fire risk.
- You are uncomfortable working with electrical connections—no shame in hiring an expert.
If your HVAC system is under warranty, check that a DIY install doesn’t void it.
The Final Check: Calibration and Performance
After 24 hours of operation, review your thermostat’s energy history in the app. You should see reduced run times compared to your old manual thermostat. Most smart thermostats learn your schedule and adjust automatically—give it a week.
Don’t be alarmed if the temperature reading seems off initially. Thermostats are often mounted near drafty spots or exterior walls. You can adjust the temperature offset in the settings by a degree or two.
Leveling Up Your DIY Workshop
Installing a smart thermostat is the kind of project that builds confidence. Once you see how simple the wiring is, you’ll be tackling other home improvements like Replacing a Light Fixture Safely or even How to Wire a 240V Outlet in Your Garage.
Having the right air compressor on hand makes future projects—like cleaning dust out of a generator, inflating tires, or blowing out sprinkler systems—much easier. The DEWALT Pancake Air Compressor (6 Gallon, 165 PSI) is a popular choice for its reliability and portability.

And if you prefer cordless convenience, the CRAFTSMAN V20 Cordless Inflator (tool only) gives you up to 150 PSI without dragging a hose.

For seasonal maintenance, pair your compressor with an air tool kit—like the DYNAMIC POWER 50 Piece Kit—to tackle everything from fastening to chiseling.

Conclusion: A Smarter Home, a Smarter DIYer
You now have all the knowledge to install a smart thermostat safely and confidently. The job requires patience with wire labeling, a firm grip on safety, and a willingness to learn your home’s heating and cooling system.
By using a few power tools—especially an air compressor for cleaning—you elevate the quality of your work and avoid future callbacks. Plus, every tool you buy for this project will serve you in dozens of other home repairs.
Your next weekend project might be Building a Workbench in a Weekend or Painting a Room the Right Way. The skills and tools transfer. And you’ll never look at a thermostat the same way again.
Now go flip that breaker and enjoy your new smart home upgrade.