
If you’re serious about running heavy-duty compressors, welders, or large power tools in your garage, a standard 120V outlet won’t cut it. Upgrading to a 240V circuit unlocks the full potential of your workshop equipment—especially powerful air compressors like the DEWALT Pancake Air Compressor, 6 Gallon, 165 PSI (DWFP55126) or the PORTER-CABLE Air Compressor, 6-Gallon, Pancake, Oil-Free (C2002-ECOM). This guide walks you through every step—from planning and safety to pulling wire and making connections—so you can tackle this job with confidence.
Whether you’re wiring for a new compressor station or future-proofing your shop, knowing how to wire a 240V outlet in your garage is a core skill for any DIYer or professional.
Why 240V for Your Garage?
Most residential garages are wired with 120V circuits, which supply around 1,800 watts (15 amps). A large air compressor motor can easily draw 2,000+ watts under load. That’s a recipe for tripped breakers and poor performance. A 240V circuit doubles the available voltage, allowing the same wire size to deliver twice the power with less current—meaning less voltage drop and cooler operation.
Key benefits of a 240V outlet:
- Powers high-draw tools like air compressors, welders, and table saws
- Reduces amperage for the same wattage (e.g., a 3 HP motor draws ~12A at 240V vs ~24A at 120V)
- More efficient motor starting, less wear on components
- Frees up 120V circuits for other tools and lights
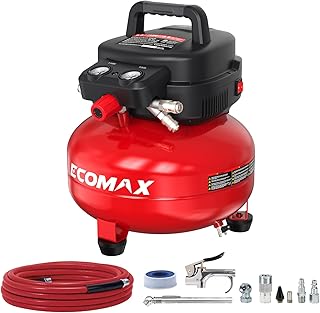
Many compressors in the 3–5 HP range come factory-configured for 240V. For example, the CRAFTSMAN Air Compressor, 2 Gallon (B0DLKSR6LD) is light enough for 120V, but if you step up to a 6-gallon pancake like the ECOMAX Air Compressor 6 Gallon 150 PSI (B0D7322DB2), you’ll want the option to run it on 240V for maximum performance.

Planning Your 240V Circuit
Before touching any wires, plan the circuit to meet both electrical code and your tool’s requirements.
Determine Load Requirements
Check the nameplate on your compressor or tool. It lists voltage (240V), full-load amperage, and horsepower. Use this to size your breaker and wire.
Common compressor sizes and circuit needs:
| Compressor HP | Typical Amps (240V) | Recommended Breaker | Wire Gauge |
|---|---|---|---|
| 1.5 HP | 7–9 A | 15 A | 14 AWG |
| 2 HP | 10–12 A | 15 A | 14 AWG |
| 3 HP | 13–15 A | 20 A | 12 AWG |
| 5 HP | 20–24 A | 30 A | 10 AWG |
Always size the wire and breaker for 125% of the continuous load (NEC 210.19(A)(1)). For a 12A motor, that’s 15A minimum.
Choose Outlet Type
Most garages use NEMA 6-15R (15A) or 6-20R (20A) receptacles. For larger compressors, a NEMA 6-30R or 6-50R may be needed. The plug on your compressor determines the receptacle; you can also hardwire the unit.
- NEMA 6-15: 2 poles, 1 ground, 15A
- NEMA 6-20: 2 poles, 1 ground, 20A
- NEMA 6-30: 2 poles, 1 ground, 30A
- NEMA 6-50: 2 poles, 1 ground, 50A
Run the Numbers
Locate your breaker panel. Measure the distance from panel to outlet location to estimate wire length. Add 20% for bends and slack.
Pro tip: Run a dedicated circuit. Sharing a 240V circuit with multiple tools can cause nuisance trips and voltage drop.
Safety First
Wiring a 240V outlet involves working inside your breaker panel with line voltages that can kill. Follow these rules:
- Turn off main breaker before opening panel.
- Use a non-contact voltage tester to confirm power is dead.
- Wear insulated gloves and eye protection.
- Check local codes—some areas require a permit and licensed electrician.
- Never oversize a breaker beyond the wire’s ampacity.
If you’re unsure about any step, consult a professional. This guide is educational; local codes and conditions vary.
Tools and Materials Needed
Gather everything before you start.
Tools
- Voltage tester
- Wire strippers
- Screwdrivers (flat and Phillips)
- Drill with hole saw (for running cable through studs/joists)
- Fish tape (for pulling wire)
- Hammer and staples for cable
- Multimeter (for testing continuity)
Materials
- Breaker: 2-pole (240V) of appropriate amperage, matching your panel brand
- Wire: NM-B (Romex) or THHN in conduit. For most garages, 12/2 with ground (12 AWG, 2 conductors + ground) for 20A, or 10/2 for 30A.
- Receptacle: NEMA 6-20R, 6-30R, etc., with weatherproof cover if exposed
- Outlet box: 4×4 metal or deep plastic
- Cable clamps, wire connectors (wire nuts), strain reliefs
- Conduit (if running in exposed locations): EMT or PVC
| Item | 20A Example | 30A Example |
|---|---|---|
| Breaker | Square D QO220 (2-pole 20A) | Square D QO230 (2-pole 30A) |
| Wire | 12/2 NM-B (Southwire) | 10/2 NM-B (Southwire) |
| Receptacle | Leviton 5472 (NEMA 6-20R) | Leviton 5374 (NEMA 6-30R) |
Step-by-Step Wiring Instructions
Step 1: Turn Off Power
Flip the main breaker to the OFF position. Double-check with your non-contact tester at the panel and at the outlet location.
Step 2: Install the Breaker in the Panel
Remove the panel cover. Locate an open slot for a 2-pole breaker. Snap the new breaker in—ensure the “hot” tabs seat correctly. Do not connect the wire yet.
Step 3: Run the Cable from Panel to Outlet
Measure and cut the NM-B cable. Use fish tape to pull it through walls, attic, or crawlspace. Secure cable every 4.5 feet with staples. Leave about 12 inches extra at both ends.
If your garage is finished, you may need to run conduit on the surface. Use ½” EMT for 12 AWG wire. Pull THHN conductors through—black, red, and green (or bare). Mark the neutral/ground as needed.
Step 4: Connect the Receptacle
Mount the outlet box. Strip about 6 inches of outer jacket from the cable. Connect wires:
- Black wire → Brass screw (one of the hot terminals)
- Red or white wire (if re-identified) → Other brass screw (the other hot leg)
- Bare copper or green → Green ground screw
For a 240V receptacle, the white wire (if used) must be re-identified with black or red tape to indicate it’s hot.
Note: 240V outlets do not use a neutral wire (no silver screw). The two hots carry 120V each relative to ground.
Carefully push wires into box. Attach receptacle to box with screws.
Step 5: Connect the Breaker
Back at the panel, strip about ½ inch from the black and red (or black/white) wires. Connect each to one of the breaker’s terminals. Torque to manufacturer spec. Connect the ground wire to the ground bus bar.
Step 6: Test Before Closing
Turn the main breaker back on. Flip the new 240V breaker to ON. Use a multimeter to test between the two hot slots on the receptacle—you should read 240V (±5V). Also test each hot to ground: 120V each.
If no voltage, turn off power and check connections.
Step 7: Label and Secure
Label the breaker clearly: “240V Garage Outlet”. Install a cover plate on the receptacle.
Testing and Verification
After wiring, plug in a simple device like a 240V compressor or use a receptacle tester. Check that the motor runs smoothly without tripping the breaker.
Common issues and fixes:
| Problem | Likely Cause | Solution |
|---|---|---|
| No power | Breaker tripped or loose connection | Check breaker; tighten wires |
| Motor hums and won’t start | One hot leg dead | Verify both lines have voltage |
| Breaker trips instantly | Short circuit or wrong breaker size | Inspect wiring; match breaker to load |
Code Considerations and Permits
The National Electrical Code (NEC) requires:
- AFCI protection in garages (for 120V circuits, but 240V circuits may be exempt depending on local adoptions). Check with your inspector.
- GFCI for 125V receptacles in garages (but 240V receptacles usually don’t require GFCI unless in wet locations).
- Proper wire support – cable must be secured within 12 inches of the box.
- Conduit fill limits if using THHN.
Always pull a permit for new circuits. It ensures the work is inspected and safe—vital for insurance coverage.
Sizing Your Outlet for Specific Compressors
Not all compressors ship set for 240V. Many allow field conversion. Let’s look at real-world products from the market.
DEWALT Pancake Air Compressor, 6 Gallon, 165 PSI (DWFP55126): This model runs on 120V standard. To use it on 240V, you’d need to check the motor’s voltage rating. Most pancake compressors under 2HP are 120V-only. For true 240V, look at units like the PORTER-CABLE C2002-ECOM which is also 120V. However, many “dual voltage” compressors allow switching by rewiring the motor. Always consult the manual.
CRAFTSMAN Air Compressor, 2 Gallon (B0DLKSR6LD): Small, portable, 120V. Perfect for lighter tasks on a standard outlet. No 240V needed.
ECOMAX Air Compressor 6 Gallon 150 PSI (B0D7322DB2): Also 120V. But if you plan to upgrade later, wiring a 240V outlet now means you’ll be ready for a larger stationary compressor.
For heavy-duty use, consider a compressor like the DEWALT Tire Inflator Portable 20V MAX (DCC020IB)—cordless, no wiring needed. But for continuous shop use, nothing beats a wired 240V setup.
Internal Links to Related Knowledge
Deepen your workshop expertise with these guides from Builders Nirvana:
- How to Choose the Right Air Compressor Size for a Home Garage
- Pancake, Hot Dog, and Twin Stack Compressors Explained
- Oil-Free vs Oil-Lubricated Air Compressors: Which One Fits Your Workshop
- Why Your Air Compressor Keeps Tripping the Breaker (And What to Do)
- Air Compressor Maintenance Schedule: A Monthly Checklist
- How to Drain Your Air Compressor Tank the Right Way
- Common Air Compressor Problems and How to Fix Them Yourself
- The Best Quiet Air Compressors for Indoor Use
- Air Hose Size Guide: Picking the Right Diameter for Your Tools
- How Long Can You Run an Air Compressor Continuously?
Product Recommendations for Your Garage
When you’re setting up a compressor station, having the right accessories makes a huge difference. Here are top-rated items that pair well with a 240V outlet.
Air Tools:
- DYNAMIC POWER 50 Pieces Air Tool Kit (D-W3-50K) – Includes impact wrench, ratchet, air hammer. Perfect for automotive work.
- JASTIND Industrial Air Blow Gun (B07GJQJJMQ) – Brass adjustable nozzle for cleaning parts.
- High Volume Powerful Industrial Air Blow Gun (B07DQJDZNR) – Extensible stainless steel nozzle with 360° swivel.

Cordless Options (if you want flexibility without a 240V circuit):
- CRAFTSMAN V20 Air Compressor Cordless (CMCE521B) – 150 PSI, digital gauge, tool only.
- CRAFTSMAN V20 Tire Inflator (CMCE520B) – Three modes: cordless, 120V corded, 12V car adapter.
- DEWALT 20V MAX Tire Inflator (DCC020IB) – Automatic shut off, LED light.
Final Thoughts: Power Your Workshop the Right Way
Wiring a 240V outlet in your garage is a manageable project if you follow proper safety and code. It’s the single best upgrade for running large compressors and power tools at peak efficiency. Whether you choose a PORTER-CABLE C2002-ECOM for light-duty or a DEWALT DWFP55126 for bigger jobs, having that dedicated high-voltage circuit ensures reliable starts and longer motor life.
Remember: always match the breaker and wire to the load, and never skip the permit if required. With careful planning, you’ll have a professional-grade electrical setup that serves your workshop for years.
For more workshop electrical guides and compressor knowledge, explore the internal links above. Your next project—whether it’s building a workbench or setting up dust collection—will benefit from a solid power foundation.