
Patching drywall isn’t just about slapping some joint compound over a hole. Professionals achieve seamless repairs by choosing the right tools and techniques. An air compressor, for instance, can speed up texturing, blow away dust, and power specialty tools. Pair that with a quality pancake compressor like the DEWALT Pancake Air Compressor, 6 Gallon, 165 PSI (DWFP55126), and you cut repair time in half while boosting finish quality.

Whether you’re fixing a nail pop or a fist-sized hole, mastering drywall patching like a pro means understanding your materials, tools, and technique. This deep dive covers everything from compressor selection to the final sanding pass.
Essential Tools for Professional Drywall Patching
Having the right gear separates a DIY repair from a pro-grade result. Let’s break down the must‑haves, with special emphasis on air compressors and power tools.
Air Compressors: The Heart of a Pro Workshop
An air compressor powers many drywall tasks: driving staples for backing, spraying texture, and cleaning dust with a blow gun. A compact unit that delivers 125–165 PSI with a 6‑gallon tank handles most home repairs without taking up half your garage.
Here are top‑rated models perfect for drywall patching:
| Model | Tank Size | Max PSI | Rating | Key Feature |
|---|---|---|---|---|
| CRAFTSMAN Air Compressor, 2 Gallon | 2 Gal | 125 | 4.0 | Ultra‑lightweight, 10‑piece accessory kit |
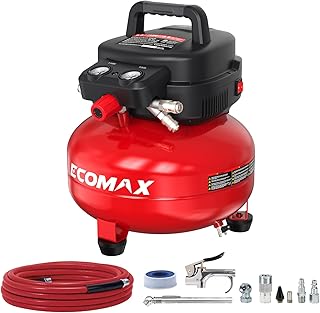
| ECOMAX Air Compressor 6 Gallon | 6 Gal | 150 | 4.7 | Pancake design, oil‑free, extremely quiet |
| PORTER-CABLE 6-Gallon Pancake (C2002-ECOM) | 6 Gal | 150 | 4.6 | High flow at low amp draw, durable |
| DEWALT Pancake 6 Gallon (DWFP55126) | 6 Gal | 165 | 4.6 | High‑output motor, quick recovery time |
For small patching jobs, a 2‑gallon unit works fine. But if you plan to spray texture or use a stapler, go with a 6‑gallon pancake. Learn more about sizing in our guide: How to Choose the Right Air Compressor Size for a Home Garage.

Blow Guns for Dust-Free Workspaces
Drywall sanding creates a fine dust that settles everywhere. A quality blow gun connected to your compressor blasts dust out of crevices and off the repair area before priming. Two excellent options:
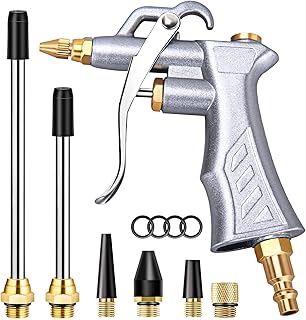
- JASTIND Industrial Air Blow Gun – Brass nozzle, adjustable airflow, and two steel extensions. Perfect for detail dusting.
- High Volume Powerful Industrial Air Blow Gun – Extends 17–26 inches with a 360° swivel hook. Great for reaching high corners.
Other Power Tools That Help
- Drywall screw gun – Adjustable depth prevents paper tearing.
- Oscillating multi-tool – Cuts clean openings for patches.
- Palm sander – Faster than hand sanding, but use a vacuum attachment to control dust.
Need a stable work surface? Read How to Build a Workbench in a Weekend.
Step-by-Step Drywall Patching Process
Follow these steps to get a repair that blends invisibly with the surrounding wall.
1. Prepare the Hole
Cut away loose drywall paper and crumbling edges. Use a utility knife or oscillating tool to create a clean rectangle or square. For holes larger than 6 inches, install a wood backing (scrap 2×4) screwed behind the opening.
Pro tip: Drive the backing screws slightly below the drywall surface so they don’t bulge. A cordless driver paired with a compressor‑powered stapler makes this step fast.
2. Cut and Fit the Patch
Measure the opening and cut a new piece of drywall slightly oversized. Use a drywall square to ensure straight edges, then trim to fit snugly. The patch should sit flush with the surrounding wall — no gaps larger than 1/8 inch.
3. Secure the Patch
Drive drywall screws through the patch into the backing. For small holes (less than 4 inches), you can use self‑adhesive mesh tape and joint compound alone, but a solid patch is always stronger.
Use your compressor here: If you have a drywall stapler attachment, fasten the patch quickly without overdriving. The PORTER-CABLE 6-Gallon Pancake supplies enough air to run a stapler continuously.
4. Apply the First Coat of Joint Compound
Spread a thin layer of all‑purpose joint compound over the patch and tape (mesh or paper). For paper tape, embed it fully. For mesh, simply cover with compound. Use a 6‑inch taping knife to feather the edges.
Keep air tools handy: After every few passes, use a blow gun to clear dried crumbs from your knife and the work area.
5. Let Dry and Apply Second Coat
Allow 24 hours for the first coat to dry (or 2–3 hours if using fast‑setting compound). Sand lightly with 120‑grit paper, then apply a second, wider coat using an 8‑ or 10‑inch knife. Feather outward 6–8 inches beyond the patch.
6. Final Coat and Sanding
After drying, apply a third coat, extending 10–12 inches. The goal is a gradual transition, not a hump. Once fully dry (48 hours for standard compound), sand with fine 220‑grit paper. Vacuum dust, then blow away remaining particles with your blow gun.
7. Texture Matching
This is where an air compressor really shines. If your wall has any texture (orange peel, knockdown, or spray), you can replicate it using a texture hopper attached to your compressor.
For orange peel: Use a small hopper with thin joint compound. Set compressor pressure to 30–40 PSI and practice on cardboard. Apply one even pass, then let dry.
For knockdown: Spray slightly heavier texture, wait 5–10 minutes, then lightly drag a knockdown knife across the peaks.
The ECOMAX 6 Gallon Air Compressor (rated 4.7 stars) maintains steady pressure for consistent spray patterns.
Pro Tips for a Flawless Finish
Small tricks elevate your patching from amateur to professional.
- Use a damp sponge instead of sandpaper for final smoothing on the last coat. It eliminates dust and keeps edges crisp.
- Prime before painting – Unsealed joint compound absorbs paint unevenly. Always use a drywall primer.
- Blow out your powder‑actuated fastener holes – Before applying spackle, use a blow gun to remove debris so compound sticks better.
- Work in thin layers – Thick coats crack and take forever to dry. Three thin coats are stronger than one thick one.
For more compressor care, check out Air Compressor Maintenance Schedule: A Monthly Checklist.
Quick Dust Control with a Blow Gun
After sanding, attach a High Volume Blow Gun to your compressor. Use it to clean the patch area, the floor, and even your tools. A short blast of air removes dust from crevices that a vacuum misses.
Safety: Always wear eye protection and a dust mask when using a blow gun — debris can fly unexpectedly.
Common Mistakes and How to Avoid Them
Even experienced DIYers slip up. Here are the biggest pitfalls with drywall patching.
Using Too Much Joint Compound
Applying compound too thick creates a bubble or a hump that’s impossible to sand flat. Remember: thin coats, wide feathering. If you press hard, you’ll depresses the patch.
Skipping the Primer
You paint over the patch and the spot looks dull and blotchy. Primer seals the compound and ensures uniform sheen. Never skip this step.
Wrong Compressor Pressure for Texture
If your texture gun sputters or drizzles, your compressor’s pressure is off. Most texture hoppers need 30–50 PSI. Too high and it blows holes in the mud; too low and it won’t atomize.
Refer to Pancake, Hot Dog, and Twin Stack Compressors Explained to understand which tank style suits your needs.
Not Letting Each Coat Dry Fully
Joint compound shrinks as it dries. Rushing leads to cracks and rough surfaces. Wait the full drying time between coats, especially in humid conditions.
Forgetting to Clean Your Compressor
After using a texture hopper, residual mud can gum up your regulator and hose. Flush the system with water (if oil‑free) or blow it clear. See How to Drain Your Air Compressor Tank the Right Way.
Why Professionals Rely on Air Compressors
Beyond texture guns and blow guns, an air compressor serves as a power source for staple guns (for securing backing), spray primers, and even nail guns for baseboard trim that goes over the patched area. Having a portable unit like the CRAFTSMAN V20 Tire Inflator is handy for inflating tires on your project cart, but for heavy drywall work, stick with a tank‑style compressor.
If you’re choosing between oil‑free and lubricated, read Oil-Free vs Oil-Lubricated Air Compressors: Which One Fits Your Workshop. Oil‑free models (like the PORTER-CABLE C2002-ECOM) are low‑maintenance and perfect for occasional use.
Final Thoughts on Achieving Professional Drywall Patching
Patching drywall like a pro comes down to preparation, patience, and power tools. An air compressor isn’t strictly necessary, but it transforms the experience — from effortless dust removal to flawless texture matching.
Start with a reliable pancake compressor. The DEWALT DWFP55126 is a popular choice among pros for its 165 PSI output and fast recovery. Pair it with a good blow gun and a texture hopper, and you’ll handle any repair with confidence.
Remember: each coat should be thin, each sanding light, and each corner clean. With these tools and steps, your drywall patches will disappear into the wall — no one will ever know there was a hole.
For more power tool insights, explore Cordless vs Corded Tools: Where Each One Still Wins. Happy patching!