
Water hammer may sound like a minor nuisance, but for anyone running power tools and compressors, it’s a hidden threat that can crack pipes, damage fittings, and shorten the life of your equipment. That sudden bang or shudder in your air lines isn’t just annoying—it’s a pressure surge that demands immediate attention.
In this guide, you’ll learn exactly how to test for water hammer in compressed air systems, what causes it, and the most effective ways to stop it. We’ll cover everything from diagnostic techniques to practical fixes, and highlight the best tools and compressors to keep your workshop running smoothly.
What Is Water Hammer in a Compressed Air System?
Water hammer, also called hydraulic shock, occurs when a fluid (or a mixture of fluid and air) suddenly stops or changes direction. In compressed air systems, the “fluid” is often condensate—water that has collected inside the air lines. When a valve closes quickly or a tool shuts off, that slug of water slams into fittings, elbows, and regulators.
The result? A loud hammering sound, vibrations, and over time, metal fatigue, leaks, or even ruptured pipes. Understanding the difference between normal pneumatic operation and actual water hammer is the first step to protecting your shop.
Causes of Water Hammer in Compressed Air Systems
Before you can stop water hammer, you need to know why it happens. These are the most common culprits:
- Condensation buildup – Warm, moist air from the compressor cools inside the pipes, forming water droplets that pool in low spots.
- Rapid valve closure – When a solenoid valve or tool trigger snaps shut instantly, the momentum of the water column creates a shockwave.
- Undersized piping – Narrow pipes increase flow velocity, which worsens hydraulic shock.
- Improper pipe slopes – Without proper drainage, water collects and accelerates when air flow resumes.
- Lack of drip legs or traps – No way for condensate to escape before it becomes a problem.
In a typical home garage or workshop, a pancake compressor like the PORTER-CABLE C2002-ECOM can still suffer from water hammer if the air lines aren’t maintained.
How to Test for Water Hammer
Detecting water hammer early saves you costly repairs. Here are five reliable testing methods.
1. Listen for the Tell-Tale Bang
Stand near your air lines when the compressor cycles on or when you shut off a tool. A sharp, metallic bang or repeated hammering sound indicates water hammer. If you hear it only occasionally, suspect a single slug of condensate.
2. Check Pressure Gauge Fluctuations
A sudden spike on your compressor’s pressure gauge when a valve closes points to hydraulic shock. Monitor the needle for erratic jumps. Some digital gauges, like those on the CRAFTSMAN V20 CMCE520B, give precise readouts for this kind of diagnosis.
3. Use a Pressure Snubber or Dampener
Install a temporary pressure snubber (a small restrictor) between the gauge and the line. If the gauge fluctuations smooth out, water hammer is likely present. Snubbers are inexpensive and widely available.
4. Inspect for Moisture Accumulation
Open a drain valve at the lowest point of your system. If a large amount of water gushes out when you haven’t drained recently, you have a moisture problem that can trigger hammer.
5. Vibration Analysis
Touch the pipes near elbows and T‑fittings while the system is running. Excessive vibration that stops when you manually slow valve closure suggests water hammer. A simple handheld vibration meter can quantify the severity.
Symptom vs. Likely Cause Table
| Symptom | Likely Cause |
|---|---|
| Single loud bang after shutoff | Water slug hitting a closed valve |
| Repeated hammering during operation | Multiple water pockets in low points |
| Gauge needle jumps rapidly | Hydraulic shock from quick-closing valve |
| Pipes rattle continuously | Undersized lines or no drip legs |
| Water sprays from drain when opened | Excessive condensation accumulation |
Step-by-Step Guide to Stop Water Hammer
Once you’ve confirmed water hammer exists, follow these steps to eliminate it for good.
Step 1: Install an Air Receiver Tank
A larger tank acts as a buffer, smoothing out pressure spikes. If your current compressor is small, consider upgrading to a model like the DEWALT DWFP55126 (6‑gallon, 165 PSI) for more capacity. Even adding a secondary tank downstream helps.
Step 2: Add Drip Legs and Auto Drains
Drip legs—vertical pipe sections with a drain valve—collect condensate before it reaches tools. Install them at every low point. For convenience, use automatic drain valves that open periodically.
Step 3: Slow Down Valve Closure
Replace quick‑closing ball valves with slow‑acting gate valves or install flow‑control restrictors. In pneumatic circuits, use adjustable solenoid valves with cushioned closing.
Step 4: Properly Size and Slope Pipes
Ensure pipes are large enough for your CFM demand. A good rule: keep air velocity below 20 feet per second. Slope pipes 1 inch per 10 feet toward a drain point so water flows away from tools.
Step 5: Use Water Hammer Arrestors
These devices contain a sealed air chamber that absorbs the shockwave. Install one near each tool connection or common valve. For compressed air, choose arrestors rated for 150+ PSI.
Step 6: Drain Your Compressor Tank Daily
Moisture in the tank eventually enters the lines. Make it a habit to open the tank drain after each use. The ECOMAX 6‑Gallon 150 PSI Pancake Compressor has a convenient bottom drain that simplifies this task.
Step 7: Dry Your Air
For serious moisture issues, add a refrigerated air dryer or a coalescing filter. These remove water vapor before it can condense. Your air tools and blow guns will last much longer.
Tools and Products That Help
Using high-quality equipment reduces the risk of water hammer. Here are proven options from our data set.

CRAFTSMAN 2‑Gallon Air Compressor – $129.99, rating 4.0. Compact and oil‑free, great for light duty. Has a small tank, so you’ll need extra care with draining.
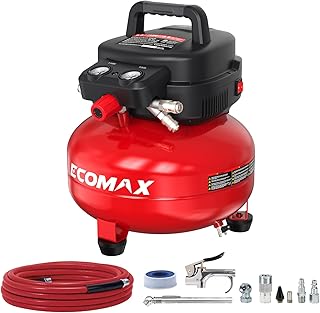
ECOMAX 6‑Gallon Pancake Compressor – $169.99, rating 4.7. Higher capacity and pressure help buffer hammer. Includes 10‑piece accessory kit.
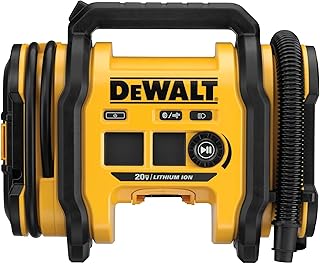
DEWALT 20V MAX Tire Inflator – $130.22, rating 4.6. Cordless tool for topping off tires; minimal water hammer risk due to low volume, but still requires moisture‑free air.

PORTER‑CABLE C2002‑ECOM – $164.00, rating 4.6. Reliable workhorse; install a drip leg to prevent hammer.

CRAFTSMAN V20 Cordless Inflator – $39.00, rating 4.6. Budget‑friendly for inflation tasks; use with a dryer if connecting to large tools.

DEWALT DWFP55126 – $204.99, rating 4.6. Excellent for medium workshops; high pressure helps overcome moisture issues.
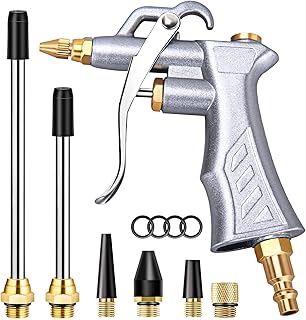
JASTIND Industrial Air Blow Gun – $11.99, rating 4.6. Adjustable flow nozzle lets you control air velocity, reducing hammer risk during cleaning.

DYNAMIC POWER 50‑Piece Air Tool Kit – $99.99, rating 4.4. Complete set for mechanics; ensure your system is hammer‑free before using the impact wrench.

High Volume Air Blow Gun with Extension – $12.99, rating 4.6. Long nozzle helps clear debris; pair with a moisture separator.

CRAFTSMAN V20 3‑Mode Inflator – $49.00, rating 4.4. Versatile for cars, batteries, and wall power. Good for inflation but not heavy hammer‑prone lines.
Preventive Maintenance to Avoid Water Hammer
Regular upkeep is your best defense. Follow an Air Compressor Maintenance Schedule: A Monthly Checklist to keep moisture under control.
- Drain the tank after every use. Trapped water is the #1 cause of hammer.
- Check and replace filters. Clogged filters increase backpressure and moisture.
- Inspect drip legs and traps. Empty them weekly.
- Listen for changes. New noises often mean new hammer issues.
Also, review our guide on Why Your Air Compressor Keeps Tripping the Breaker (And What to Do)—electrical issues can mimic or worsen water hammer.
When to Call a Professional
If you’ve tried all the DIY steps and still hear hammering, you may have a deeper problem: waterlogged underground piping, failing check valves, or incorrectly sized components. A compressed air specialist can do a pressure wave analysis and recommend custom solutions like looped piping or larger receivers.
Final Thoughts
Water hammer in your compressed air system isn’t just an annoyance—it’s a safety hazard and a equipment killer. By testing systematically and applying the fixes above, you can eliminate shocks, extend tool life, and enjoy quieter, safer operation.
Start by draining your tank today, then install a drip leg or two. Your ears and your tools will thank you.
For more insights, read about How to Drain Your Air Compressor Tank the Right Way and Oil-Free vs Oil-Lubricated Air Compressors: Which One Fits Your Workshop.