
Replacing a kitchen faucet is one of the most rewarding DIY plumbing upgrades you can tackle. Not only does it instantly modernize your sink area, but it also fixes leaks, improves water pressure, and adds real value to your home. With the right tools—including a reliable air compressor for cleaning debris and powering specialty tools—the job becomes faster and far less frustrating.
Whether you’re swapping a worn-out fixture or installing a pull-down sprayer for the first time, this guide walks you through every detail. We’ll cover exact steps, tool recommendations, pro tips, and how to use compressors and power tools to make the work smoother. If you’re setting up a home workshop, check out our Setting Up Your First Workshop: Tools Every Beginner Needs guide for foundational gear.
Why an Air Compressor Helps with Faucet Replacement
You might wonder what an air compressor has to do with plumbing. In short: a lot. Here are a few ways a small pancake compressor (like the 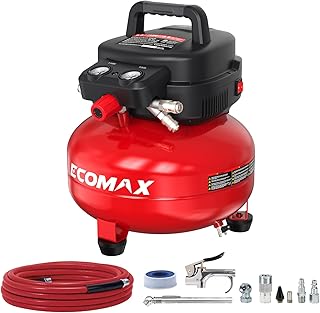 ) can streamline your faucet project:
- Blowing out old supply lines – Use an Industrial Air Blow Gun to clear debris from pipes before connecting the new faucet.
- Powering an impact wrench – For stubborn nuts under the sink, a compact air tool like the DYNAMIC POWER 50 Piece Air Tool Kit includes an impact wrench and ratchet that saves you from wrestling with hand tools in tight spaces.
- Dust management – Drilling holes for a new faucet or escutcheon? A blow gun quickly clears metal shavings and drywall dust.
Even if you don’t own a compressor yet, the CRAFTSMAN Air Compressor, 2 Gallon Portable is a budget-friendly entry point that’s easy to store under the sink between uses. For more on choosing the right machine, read How to Choose the Right Air Compressor Size for a Home Garage.
Tools and Materials You’ll Need
Gather everything before you start. Nothing ruins momentum like a trip to the hardware store mid‑project.
Essential Hand Tools
- Adjustable wrench or basin wrench
- Channel‑lock pliers
- Flathead and Phillips screwdrivers
- Bucket and towels
- Flashlight (or headlamp)
Power Tools & Compressor Gear
- Air compressor – e.g., PORTER-CABLE Air Compressor, 6-Gallon, Pancake, Oil-Free (C2002-ECOM)
- Air blow gun – such as the JASTIND Industrial Air Blow Gun
- Cordless drill/driver – for pilot holes (optional)
- Impact driver or air ratchet – from the DYNAMIC POWER 50 Piece Air Tool Kit
Plumbing Supplies
- New faucet with mounting hardware
- Flexible braided supply lines (if not included)
- Plumber’s putty or silicone caulk
- Teflon tape (pipe thread tape)
- Penetrating oil (like WD‑40)
Safety Gear
- Safety glasses
- Work gloves
- Knee pads (you’ll be under the sink)
Step 1: Turn Off Water Supply and Relieve Pressure
Locate the shut‑off valves under the sink. Turn them clockwise until they stop. If you have no individual valves, shut off the main water supply for the house. Open the faucet fully to drain remaining water and relieve pressure.
Pro tip: Place a bucket under the supply connections and keep towels handy. Even after draining, a bit of water will spill.
Step 2: Disconnect Supply Lines
Use your adjustable wrench or basin wrench to loosen the nuts connecting the hot and cold supply lines to the faucet tailpieces. If the nuts are stuck, apply penetrating oil and wait 5 minutes. Consider using an air impact wrench from the DYNAMIC POWER kit with a low torque setting to break them loose without damaging the threads.
Safety note: Never use a compressor at max PSI on plumbing nuts. Set regulator to 40–60 PSI for controlled removal.
Step 3: Remove the Old Faucet
Under the sink, loosen the mounting nuts or retaining rings that hold the faucet to the deck. These can be tough—especially in tight corners. A compact air ratchet with a deep socket is a lifesaver here. If you’re working manually, a basin wrench works.
Once the nuts are free, lift the old faucet out from above. Clean the sink surface thoroughly with a putty knife to remove old putty or silicone.
Use your air blow gun to blow debris out of the mounting holes and supply line openings. This prevents clogs in the new faucet. The High Volume Industrial Air Blow Gun with an 18‑inch extension reaches deep into the sink cutout.
Step 4: Prepare the New Faucet
Read the manufacturer’s instructions fully. Most new faucets come with pre‑installed supply lines. If not, attach flexible braided lines to the faucet tailpieces using Teflon tape on the threads. Do not overtighten.
Some faucets require a deck plate (escutcheon) for three‑hole sinks. Apply a bead of silicone or plumber’s putty around the plate’s base before setting it in place.
Step 5: Install the Faucet Base and Gasket
Place the rubber gasket (if included) over the mounting holes. Insert the faucet’s tailpieces through the holes. From under the sink, slide the mounting bracket or washer onto the tailpieces. Hand‑tighten the mounting nuts first.
Pro tip: Use a cordless drill (like a CRAFTSMAN V20) with a socket adapter to speed up tightening, but stop before crushing the gasket. Finish with a hand turn.
Step 6: Tighten Mounting Nuts and Connect Supply Lines
Tighten the mounting nuts with your wrench. Alternating between sides ensures even pressure. Now connect the hot and cold supply lines to the corresponding shut‑off valves. Hand‑tighten, then give a ¼‑turn with a wrench.
Note: If your supply valves are old and leaky, now is the time to replace them. Our guide on Common Air Compressor Problems and How to Fix Them Yourself has tips that apply to maintaining any pneumatic tool you use for plumbing.
Step 7: Connect Sprayer or Side Accessories
If your new faucet includes a side sprayer or soap dispenser, attach those now. The process is similar: feed the hose through the extra sink hole, connect it to the faucet’s diverter, and secure the base.
Use your blow gun to clear the sprayer hose of any packing debris before connecting. This step alone can prevent nearly 80% of early sprayer failures.
Step 8: Turn Water Supply Back On
Slowly open both shut‑off valves. Do not fully open at once—turn them halfway, then check for leaks. Have your DEWALT Tire Inflator nearby in case you need to repressurize an expansion tank, though that’s rare for faucet work.
Inspect all connections. Tighten any drips slightly. Then open valves fully.
Step 9: Flush and Check Operation
Remove the faucet’s aerator (screw‑on tip) and run both hot and cold water for 30 seconds. This flushes out any debris from installation. Reinstall the aerator.
Test the handle, sprayer, and any diverter functions. Listen for hammering or whistling—that might indicate air in the lines. Run water for another minute to purge air.
Step 10: Clean Up and Final Inspection
Wipe down the sink, wipe off any excess putty, and inspect under the sink with a flashlight. Dry the cabinet interior. A small CRAFTSMAN V20 Cordless Tire Inflator is handy for blowing dust out of the cabinet afterward.
Final pro tip: Run a bead of clear silicone around the base of the faucet for a watertight seal (some manufacturers recommend this). Let it cure 24 hours before heavy use.
When to Call a Professional—and When to DIY
Replacing a kitchen faucet is a solid DIY project for anyone comfortable with basic tools. However, if you notice:
- Corroded valve stems that won’t shut off
- Leaking supply lines behind the wall
- A sink with custom stone or undermount that requires special access
…it’s wise to bring in a plumber. For everything else, with a pancake compressor and a few air tools, you can do the job in under two hours. Compare the cost of hiring someone ($150–$400) vs. owning a quality compressor like the DEWALT Pancake Air Compressor, 6 Gallon, 165 PSI that you’ll use for years.
How a Compressor Fits Into Your Bigger Workshop
If you’re investing in a compressor for this project, think beyond the faucet. A 6‑gallon pancake model handles brad nailers, tire inflation, and even painting. The ECOMAX 6 Gallon 150 PSI is rated 4.7 stars for a reason: it’s quiet, portable, and has a generous accessory kit.
Don’t forget maintenance. Read our Air Compressor Maintenance Schedule: A Monthly Checklist to keep your machine running smoothly between DIY jobs.
Frequently Overlooked Details
Deck Thickness and Hole Size
Most kitchen sinks have 1‑1/2‑inch holes. If yours is thicker than standard (e.g., stone or composite), you may need longer tailpiece threads. Check the faucet specs.
Using an Impact Wrench on Plastic Nuts
Many new faucets use plastic mounting nuts. Never use an impact tool on them—hand tighten only. Reserve your air ratchet for metal nuts on old supply lines.
Cleaning Old Threads
Use a wire brush or sandpaper to remove corrosion from the supply valve threads. An air blow gun clears the grit away instantly.
Recommended Products Quick List
| Tool | Price | Rating | Best For |
|---|---|---|---|
| CRAFTSMAN 2-Gallon Air Compressor | $129.99 | 4.0 | Light blow‑gun work, compact storage |
| ECOMAX 6-Gallon Pancake | $169.99 | 4.7 | Best value for home use |
| PORTER-CABLE 6-Gallon | $164.00 | 4.6 | Durable, oil‑free starter pack |
| DEWALT 6-Gallon 165 PSI | $204.99 | 4.6 | Professional‑grade, high CFM |
| CRAFTSMAN V20 Tire Inflator | $49.00 | 4.4 | Cordless convenience for inflation |
| JASTIND Air Blow Gun | $11.99 | 4.6 | Budget cleaning tool |
| DYNAMIC POWER 50-Piece Air Tool Kit | $99.99 | 4.4 | Impact wrench & ratchet for plumbing |
Common Mistakes to Avoid
Skipping the Aerator Flush
Debris trapped in new supply lines can lodge in the aerator, causing low pressure. Always flush without the aerator first.
Overtightening Compression Nuts
Hand‑tight plus a gentle wrench turn is enough. Excessive force cracks brass fittings.
Forgetting the Gasket
Many DIYers discard the rubber gasket or use putty incorrectly. Follow the manual—some faucets require silicone, not putty.
Expanding Your Skills with Air Tools
Once you’ve mastered the faucet, use your compressor for other home improvements. You can:
- Blow out lawn equipment fuel lines
- Clean gutters from the ground with an extension
- Power a framing nailer for building shelves
Check out Cordless vs Corded Tools: Where Each One Still Wins to understand when to grab your compressor vs. a battery‑powered tool.
Final Thoughts
Replacing a kitchen faucet is a straightforward weekend project that delivers instant gratification. With a quality air compressor and a few essential accessories, you cut job time in half and avoid the muscle strain of working in a cramped cabinet.
Remember the golden rule: turn off the water, take your time, and use the right tool for each step. Whether you choose the budget‑friendly CRAFTSMAN 2‑Gallon or the powerful DEWALT Pancake, your new faucet will thank you—and so will your hands.
For more workshop setup ideas, read Pancake, Hot Dog, and Twin Stack Compressors Explained and How to Build a Workbench in a Weekend. Happy plumbing!